Intro to Azure ACI

Easily Deploy Containers to Azure directly from your Desktop
Introduction
Containers are now a mature solution providing an additional level of infrastructure abstraction. In many cases, containers can replace workloads traditionally powered by virtual machines.
In this blog, we are going to look at Azure Container Instances and showcase how fast and easy it is to deploy containers directly from your docker CLI to Azure.
Prerequisites
If you would like to follow along, you will need to have Azure subscription, Azure CLI and Docker Desktop instance.
What are Azure Container Instances
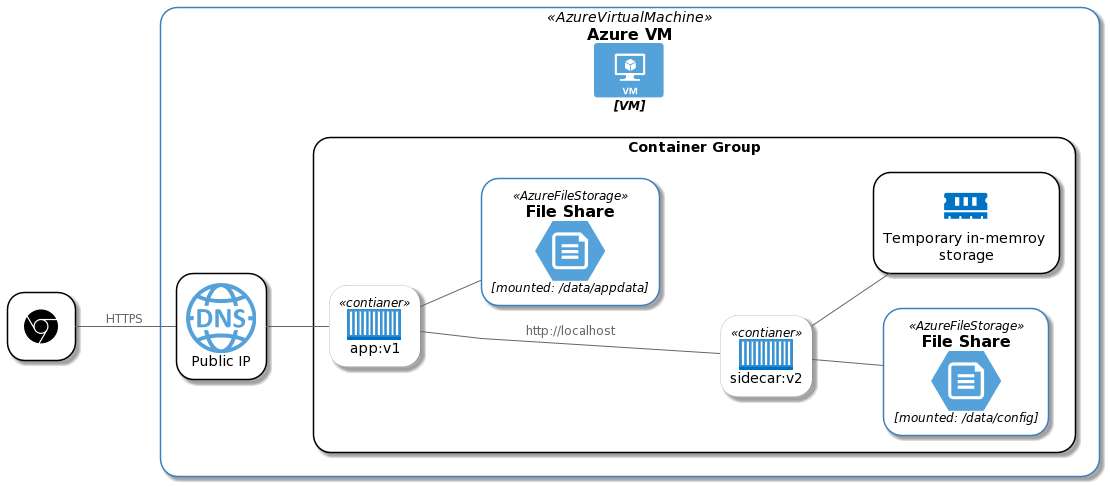
Azure Container Instances is a compute offering that bridges the gap between lightweight Azure Functions and more complex, but fully fledged Azure Kubernetes Service.

Use Cases & Characteristics
ACI is best suited for containerized workloads that can operate in isolation, simple apps, batch jobs including data science models, all kinds of tasks automation and integration scenarios.
-
**Fast startup:**Launch containers in seconds.
-
Per second billing: Incur costs only while the container is running.
-
Hypervisor-level security: Isolate your application as completely as it would be in a VM.
-
Custom sizes: Specify exact values for CPU cores and memory.
-
Persistent storage: Mount Azure Files shares directly to a container to retrieve and persist state.
-
Linux and Windows: Schedule both Windows and Linux containers using the same API.
Workflow
We are going to deploy a sample web page. The idea is that with docker CLI and ACI we can rapidly prototype, test and deploy directly from docker command line!
Important node: this flow is only for testing purposes, in real code scenario you would have CI/CD pipeline deploying your app for you.
We are going to use bash, but the same is of course possible with powershell.
*Docker CLI contains now build-in integration with Azure Container Instances through a **context **command. When using Azure CLI, you cat activate **Azure Interactive *by typing az interactive. This is an experimental feature of Azure CLI which gives you parameters completion and more!
First let’s setup variables and authenticate with Azure using docker CLI
-
setup variable for tenant to enable login: TENANT=$(az account show --query tenantId -o tsv)
-
Finally let’s login to Azure docker login azure --tenant-id $TENANT. You will be prompted to login via AD or paste authentication code.
-
Create context docker context create aci azure-context
This command is interactive and will prompt you to select subscription, resource group (create or select existing one) and location. Make sure to note resource group name if you create a new one, so later it’s easy to cleanup resources.
Now let’s deploy a test container!
-
Switch to new context docker context use azure-context
-
Run ACI hello world image docker run -d --name helloworld -p 80:80 microsoft/aci-helloworld
-
Great! Now grep for host IP and navigate to it in a browser: docker inspect helloworld | grep HostIP You should see “Welcome to Azure Container Instances!” as below.
-
Cleanup resources
-
Run docker stop helloworld to stop the container
-
Run docker rm helloworld to remove container group. Running this command completely removes container group so there are no charges.
-
Optionally remove resource group if you’ve created it only for the purpose of this demo

- Switch back to docker desktop context: docker context use default
Summary
We’ve see how easy it is to deploy a container group directly to Azure Container Instances. This could be very useful for testing purposes and quick inner development loop.
This blog barely scratches the surface of what Azure Container Instances can do and how to integrate developer workflow. In my opinion Azure Container Instances is one of the most flexible and powerful serverless offerings in Azure.
Links and Resources
There are a lot of great blogs and tutorials to check if you are interested to learn more.