Why Fast Feedback Loops Matter When Working with Kubernetes

Debugging and Testing Made Easy with mirrord
Introduction
In software development, fast, iterative feedback loops — known as dev loops — are essential for rapid prototyping and innovation. However, the complexity and disparity between local and remote execution environments can make this process challenging. Instead of staying in a flow state and quickly moving from idea to prototype, developers often have to deal with adjacent issues: building, deploying, and managing CI/CD pipelines.
Overlaying Kubernetes on top of an already complex process can turn development into a slow and painful experience. This complexity is why so many attempts have been made to solve this problem. Today, we will explore one of the most promising solutions.
The key to fast development cycles is reducing feedback time. The quicker you can test and debug, the faster you can iterate and improve.
Who Is This Content For?
This blog is for developers, DevOps engineers, and tech leads who work with Kubernetes and are tired of slow development cycles. If you’re looking for ways to improve your productivity and streamline your workflow, this is for you.
The Pain of Slow Dev Loops
Working with Kubernetes typically involves:
- Creating Containers: This step can be time-consuming, especially when dealing with complex applications.
- Pushing Images: Uploading images to a registry can take a significant amount of time, depending on the size of the image and the network speed.
- Deploying to the Cluster: Waiting for the Kubernetes cluster to pull the image and start the containers adds to the delay.
- Waiting for Feedback: Once the application is running, developers need to wait for logs and test results, which can take several minutes or more.
Each of these steps contributes to a slow development cycle, making it difficult to quickly test and debug changes. This can be particularly frustrating when trying to resolve critical issues or implement new features under tight deadlines.
By the end of this blog, you’ll learn strategies to speed up your development loop, reduce waiting times, and make debugging and testing more efficient.
Fast Feedback = Rapid Prototyping
What if we could integrate development loops so that the inner loop (code, test, build/run) seamlessly extends into the outer loop (build, test, scan, deploy, release)?
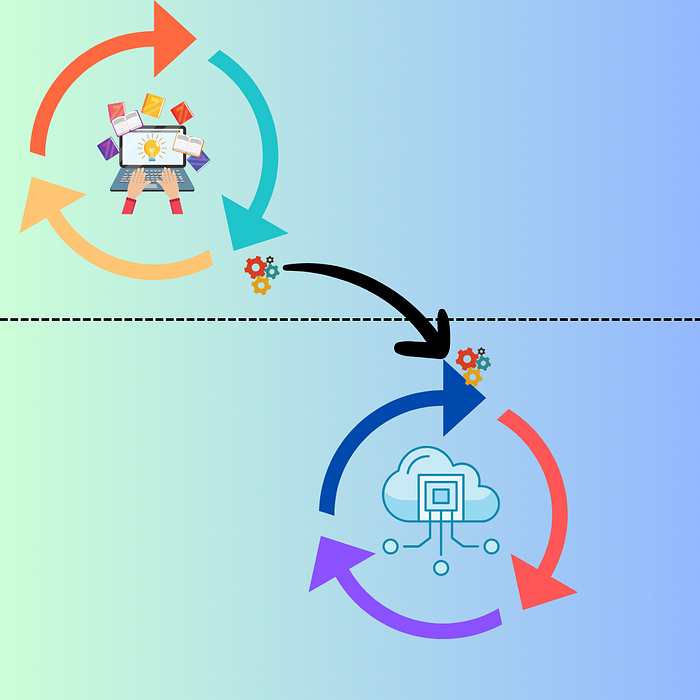
This would result in much faster feedback and iteration, leading to increased innovation. However, the development environment on my laptop or in a remote containerized service like Gitpod differs from the execution environment where the deployment is running.
What are the options?
- Recreate the Kubernetes environment locally?
Viable for some workloads. - What about recreating a cloud environment
locally?
Possible with LocalStack with AWS or TestContainers, but only to some extent.
The lowest common denominator
An interesting question to ask would be: is there something that both environments share? They do share the same container, but that’s not what I develop; it’s just a packaging mechanism. Digging deeper… how about a process 💡?
A process executing code runs on my machine the same way a process executing code runs in a containerized environment in the cloud.
Execution context matters
When executing code locally, everything needs to be set up on the local machine, including environment variables, file access, and networking. This setup ensures that the code can run as expected within the local environment. However, the context changes significantly when moving to a remote environment, such as a public or private cloud.
In a remote environment, which often includes a Kubernetes cluster running in the cloud, the infrastructure is more complex. Environment variables might be managed through cloud services or orchestration tools, file access could involve distributed storage systems, and networking might include virtual networks, load balancers, and security groups. Additionally, the context may include various integrated services such as databases, message queues, and other networking components.

A piece of code that works perfectly on a local machine might fail in the cloud due to missing environment variables, incorrect network configurations, or issues accessing remote databases and queues. This discrepancy forces developers to replicate the remote environment locally or debug issues that only appear in the cloud, slowing down the development cycle.
Testing Locally with Remote Environment
So far we have established that in order to combine the two development loops and make prototyping faster, we need to run our local process in the context of its remote environment.
This is the recipe for success; run my local process in the context of a remote environment.

Here is where mirrord can help!
Mirrord
Does exactly what we need:
mirrord is an open-source tool that lets developers run local processes in the context of their cloud environment. It makes it incredibly easy to test your code on a cloud environment (e.g. staging) without actually going through the hassle of Dockerization, CI, or deployment, and without disrupting the environment by deploying untested code
https://mirrord.dev/docs/overview/introduction/
Running App In Local Context
A simple nodejs app connects to Azure Storage
Account
and displays file content. As a developer, my task is to test my app.
Let’s run it locally by executing those 2 justfile recipes:
start_server:
 nodemon server.js

browser: start_server
 browser-sync start - proxy "localhost:3000" - files "server.js" "public/**/*"
If you want to learn more about
justfile:
Master Command Orchestration
Transform Your Projects with Just
itnext.io

Right, that’s not going to help us test a new version of my app. With
mirrord, we can connect my local process to a remote execution
environment and my app running in a pod.
This results in the traffic, environment variables, and file
operations being mirrored into my locally running process. Whew,
that’s a mouthful. Let’s run mirrord:
# Run mirrord on deployment, this resolves to a single pod
mirrord:
  @mirrord exec --target-namespace devops-team \
   --target deployment/foo-app-deployment \
   nodemon server.js
✗ just mirrord
New mirrord version available: 3.106.0. To update, run: `"curl -fsSL https://raw.githubusercontent.com/metalbear-co/mirrord/main/scripts/install.sh | bash"`.
To disable version checks, set env variable MIRRORD_CHECK_VERSION to 'false'.
When targeting multi-pod deployments, mirrord impersonates the first pod in the deployment.
Support for multi-pod impersonation requires the mirrord operator, which is part of mirrord for Teams.
You can get started with mirrord for Teams at this link: https://mirrord.dev/docs/overview/teams/
* Running binary "nodemon" with arguments: ["server.js"].
* mirrord will target: deployment/foo-app-deployment, no configuration file was loaded
* operator: the operator will be used if possible
* env: all environment variables will be fetched
* fs: file operations will default to read only from the remote
* incoming: incoming traffic will be mirrored
* outgoing: forwarding is enabled on TCP and UDP
* dns: DNS will be resolved remotely
⠖ mirrord exec
    ✓ Update to 3.106.0 available
    ✓ ready to launch process
      ✓ layer extracted
      ✓ operator not found
      ✓ agent pod created
      ✓ pod is ready
    ✓ config summary                                                    [nodemon] 3.1.0
[nodemon] to restart at any time, enter `rs`
[nodemon] watching path(s): *.*
[nodemon] watching extensions: js,mjs,cjs,json
[nodemon] starting `node server.js`
Listing all containers and their first blob:
Server running on port 3000
Container: sample-blob
Notice that now all environmental variables are fetched from the remote execution environment (Kubernetes cluster).
* env: all environment variables will be fetched
Now we should be able to navigate to localhost:3000 and see that the connection was successful:

What we have achieved is that calls from our local process are as if they were made by the remote process and calls to the remote process are mirrored to our local process.
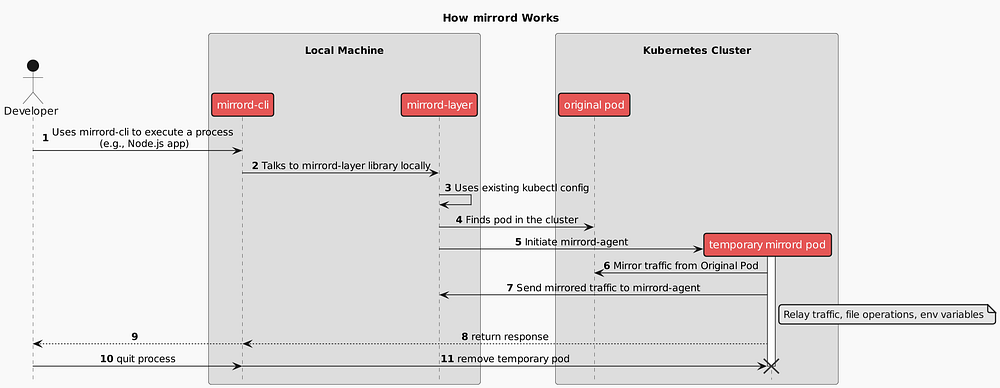
How does mirrord work
Simplifying, mirrord operates in an agentless mode, using kubectl to
connect to a cluster and create a temporary pod for mirroring. The key
components include the mirrordAgent, a Rust binary running as a
Kubernetes job that proxies local processes by sniffing network traffic
and accessing the file system of the target pod. The mirrordLayer, a
dynamic library, hooks into the local process to relay file system and
network operations to the mirrordAgent.
Real world is messier than that
Now we can iterate rapidly on a new version of my app and see how it behaves in the actual remote execution environment. This is however a simple example, there might be scenarios where we want to:
- redirect or steal all the traffic instead of mirroring it
- redirect only subset of calls or filtering out Kubernetes health checks
- redirect database writes to a local db to avoid duplicated remote writes
- run a new app or a tool in the remote context using targetless mode
Mirrord supports all those scenarios and more are being developed.
Closing Thoughts
Developing containerized applications for Kubernetes is hard. There are
many options to help with the process, including tools like
telepresence, skaffold, okteto, garden, and many more.
This tells us two things: first, there is no standardized way of
supporting developers in their efforts; and second, the space is still
growing and maturing. mirrord has a unique place in this ecosystem.
The blend of very little to no friction and strong defaults makes it an
attractive solution for cloud-native development.
By seamlessly mirroring traffic, environment variables, and file operations from the remote environment to the local process, it eliminates the common pain points in Kubernetes development. This approach not only speeds up the development cycle but also ensures that your local environment is as close to production as possible, reducing the risk of unexpected issues during deployment.
Thanks for taking the time to read this post. I hope you found it interesting and informative.
🔗 Connect with me on LinkedIn
🌐 Visit my Website
📺 Subscribe to my YouTube Channel
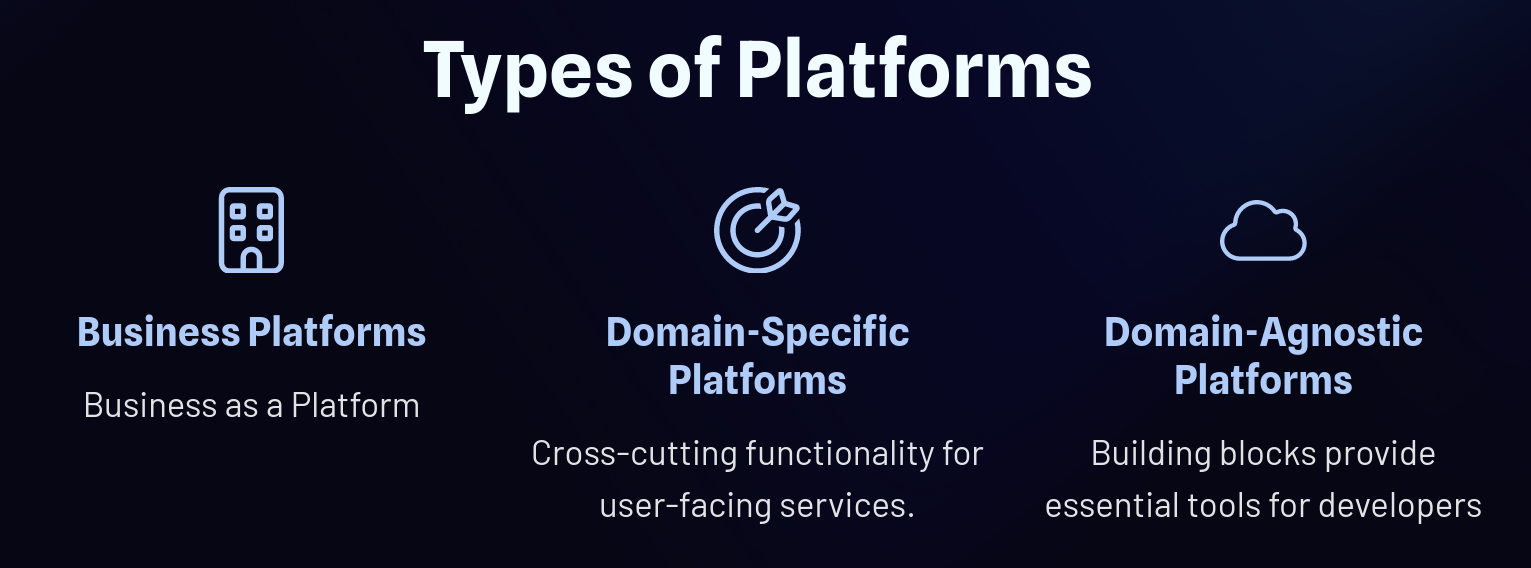 Platform Types
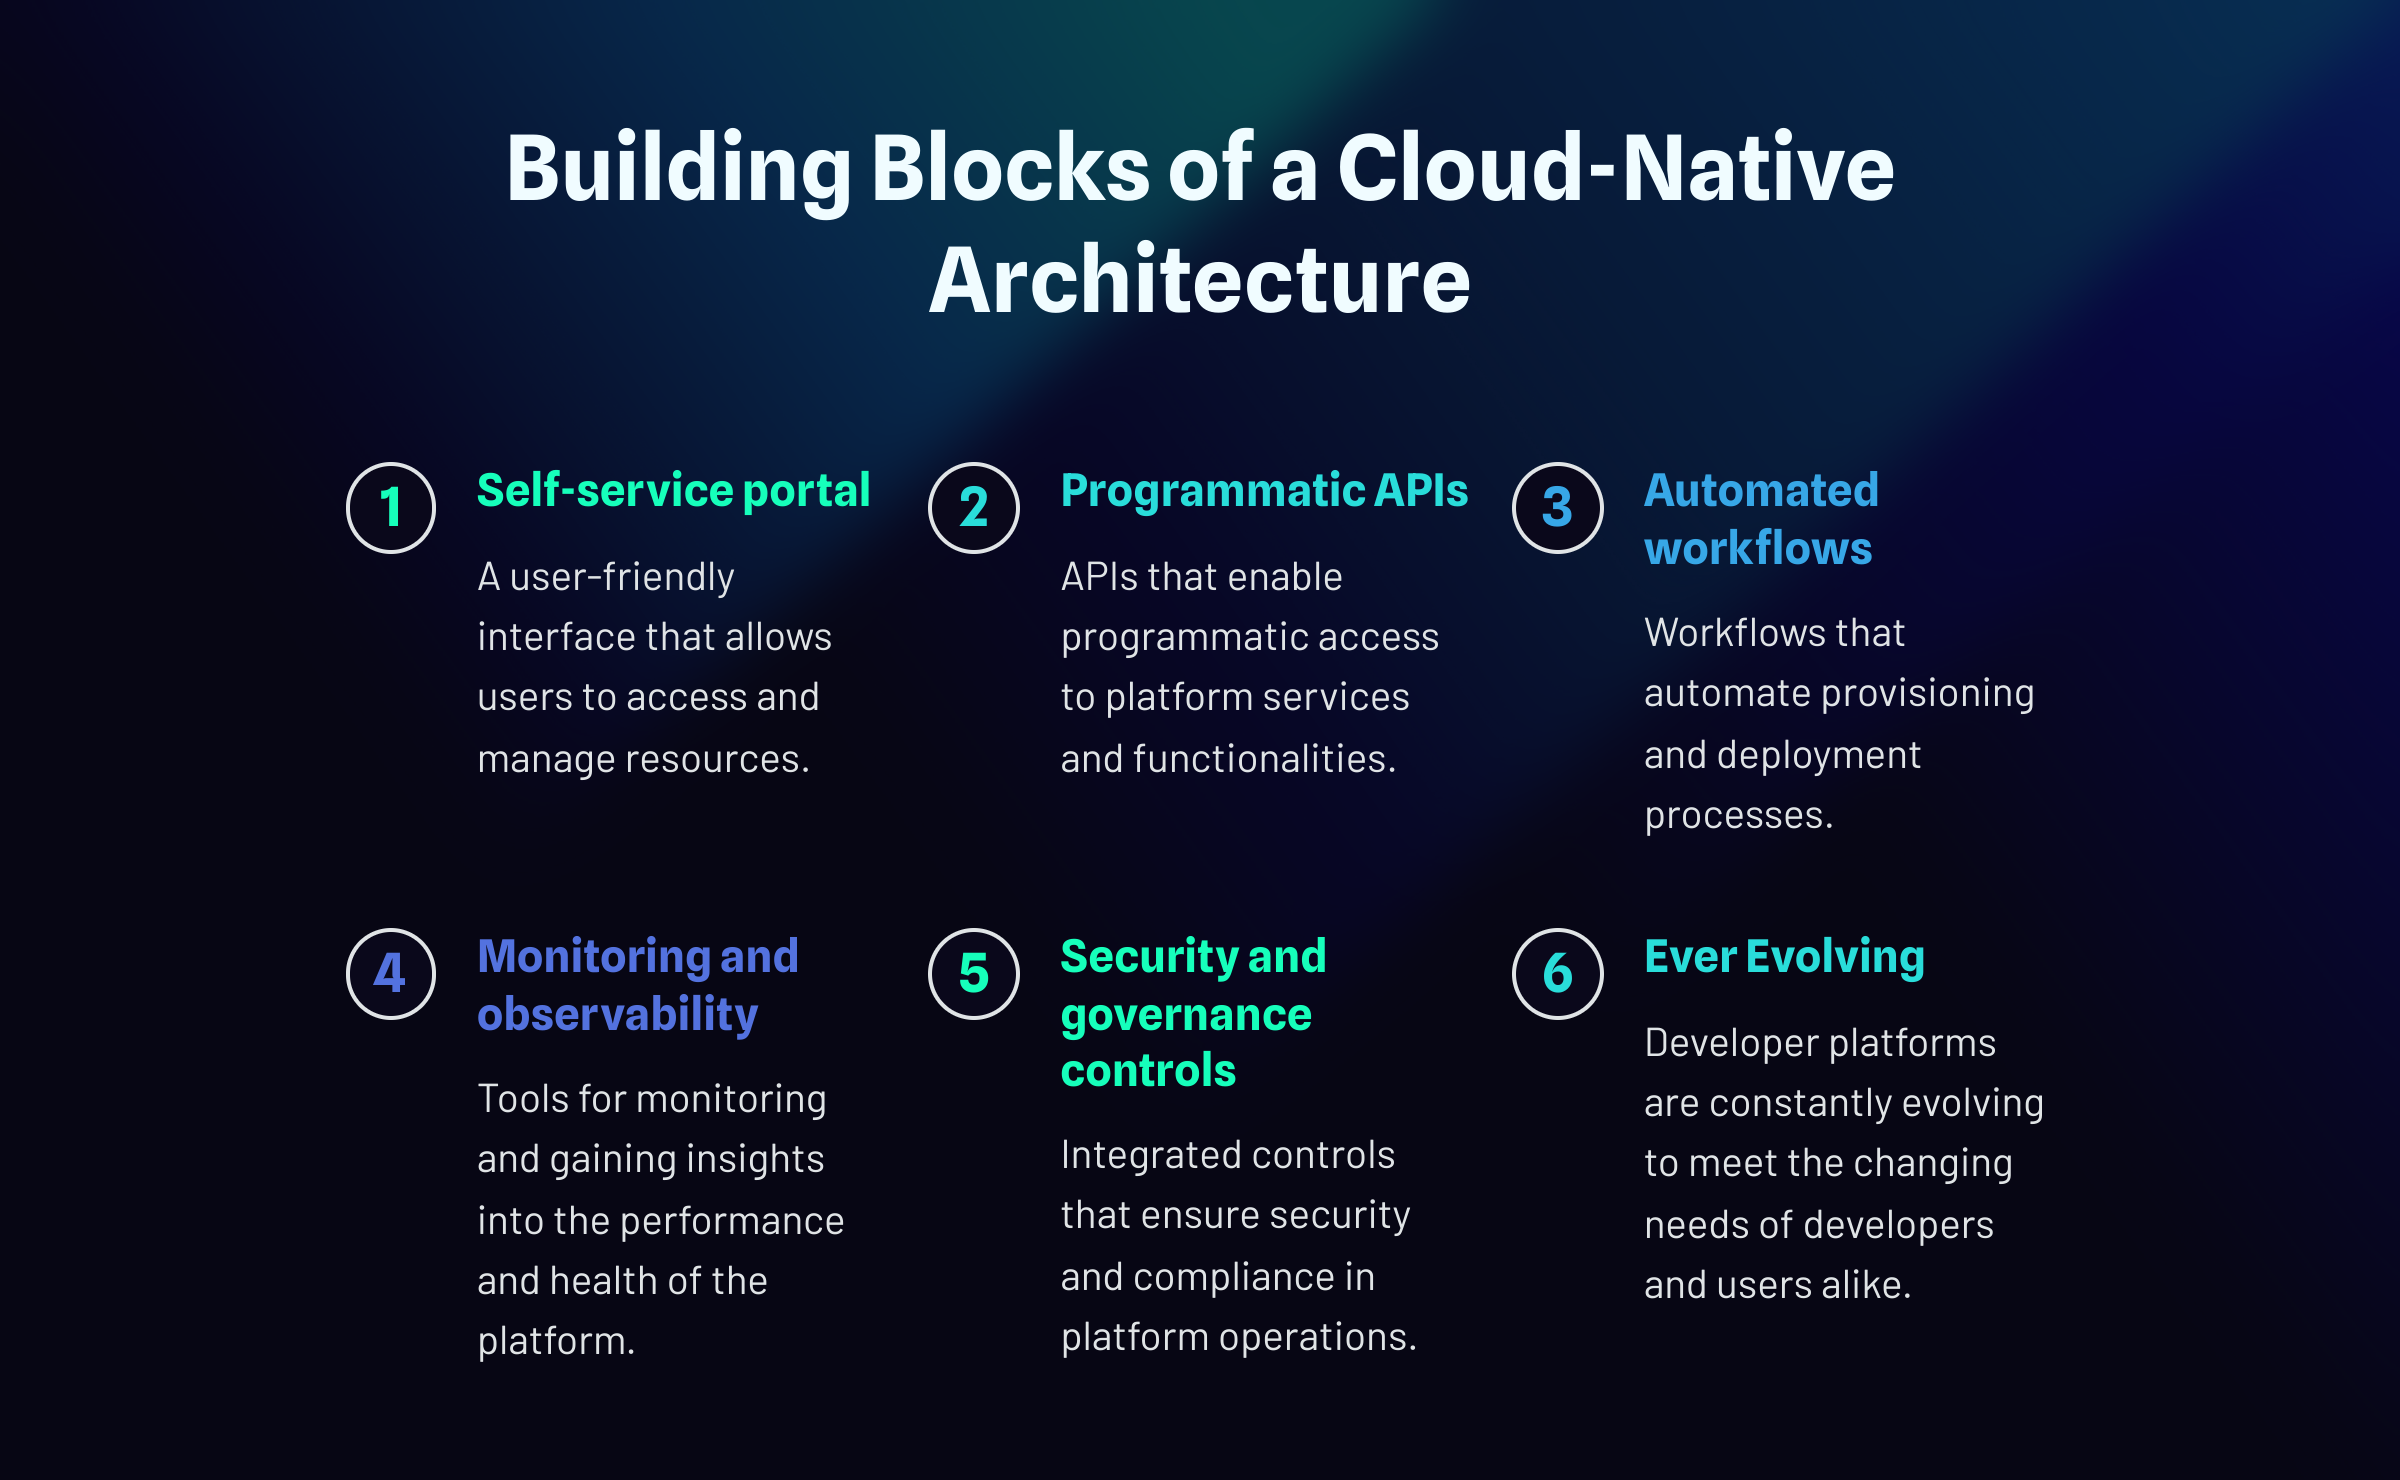 Building Blocks of Cloud-Native Platforms
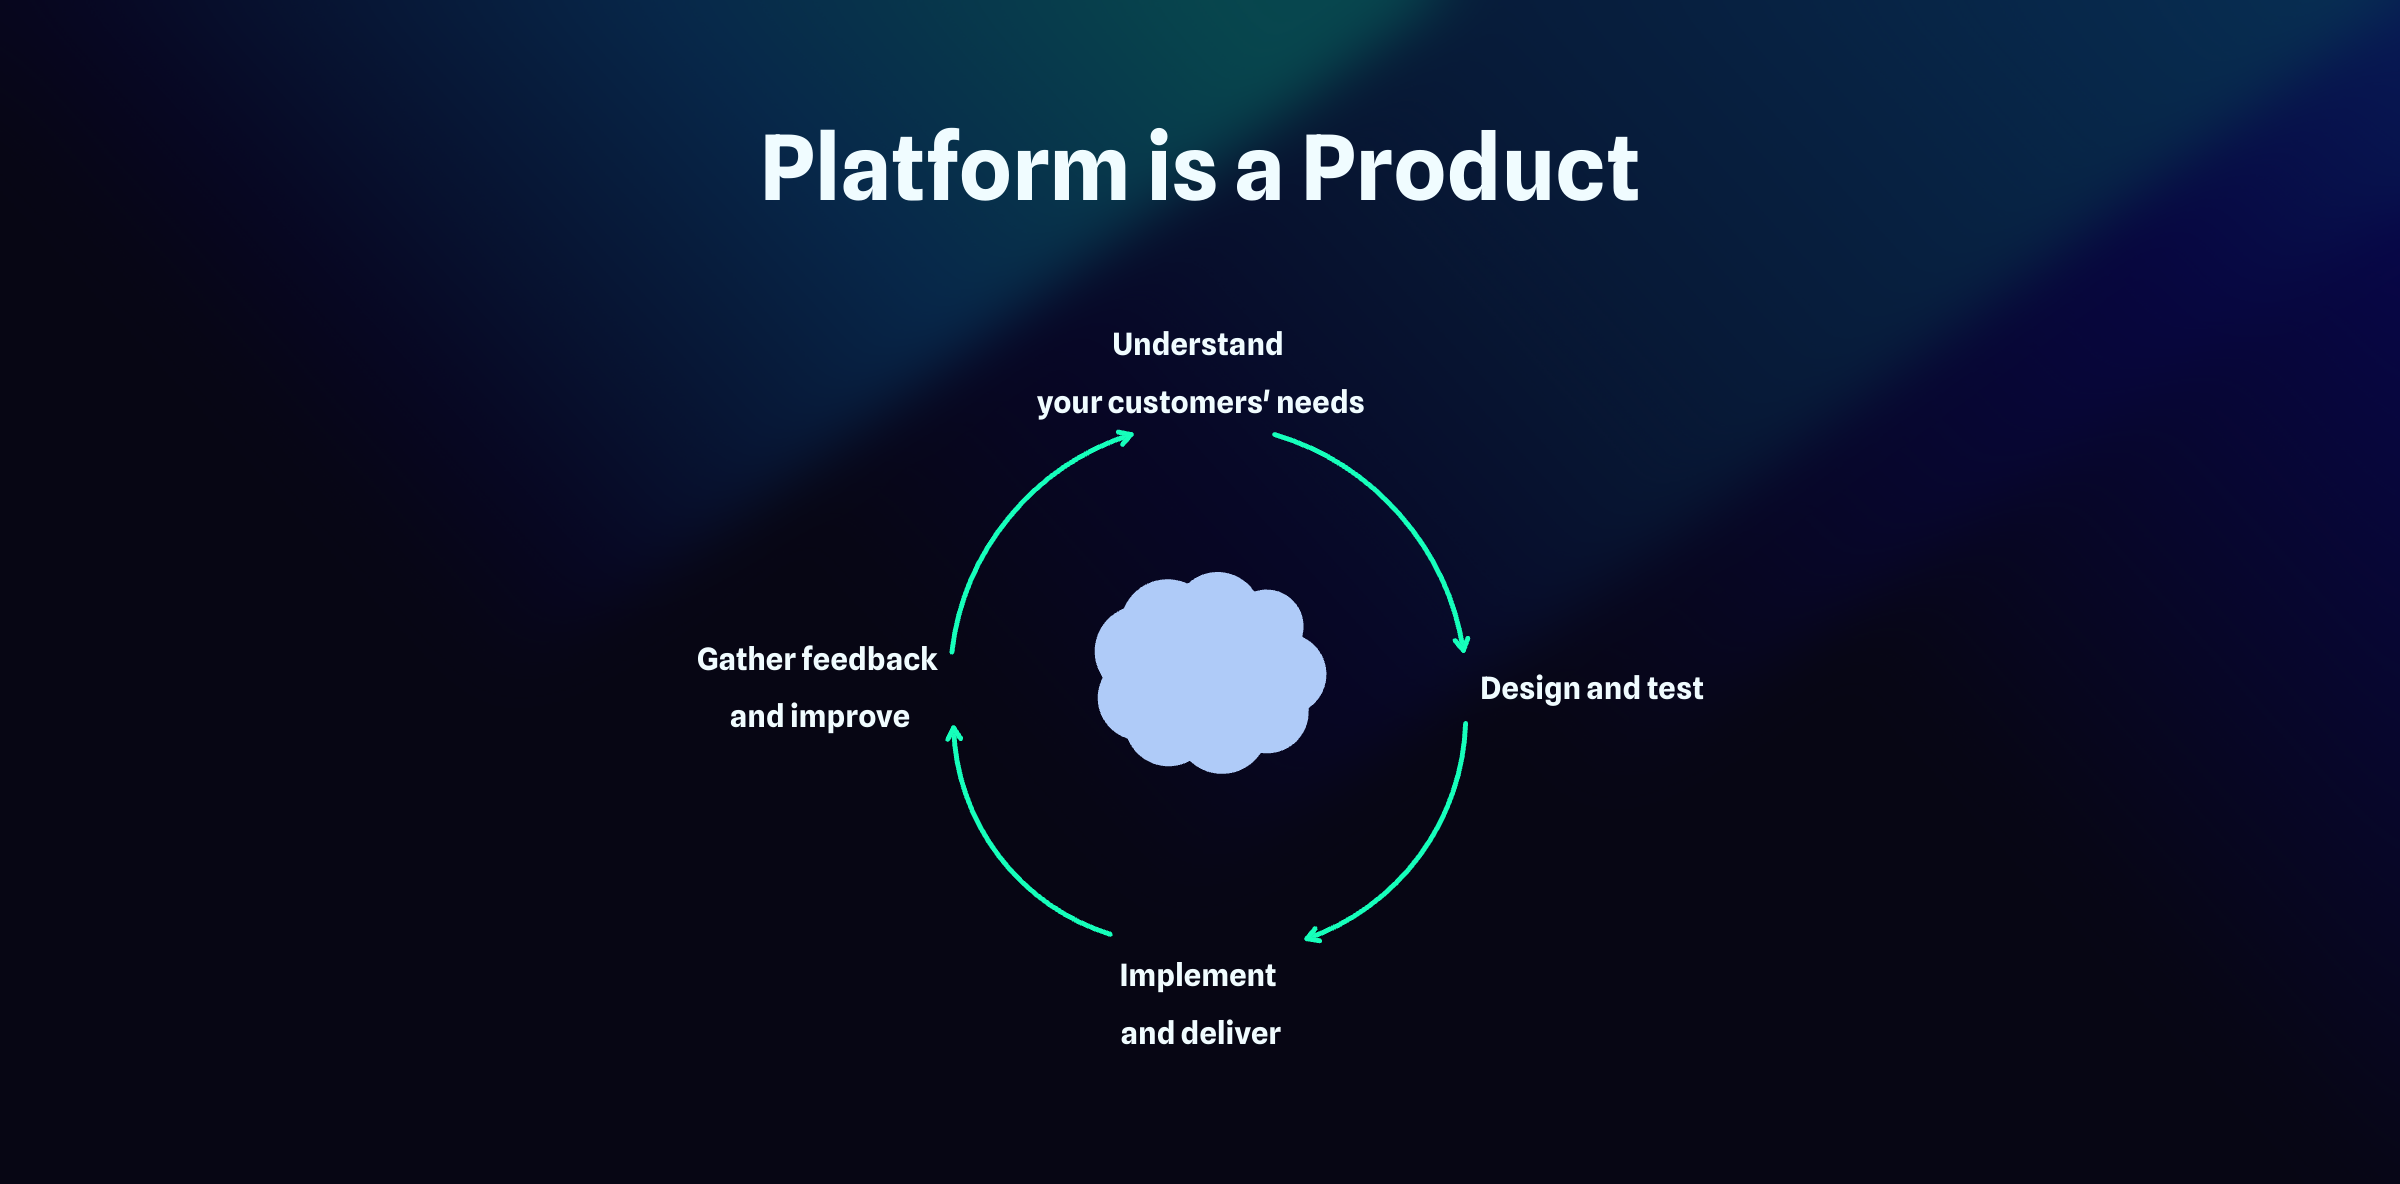 Platform as a Product
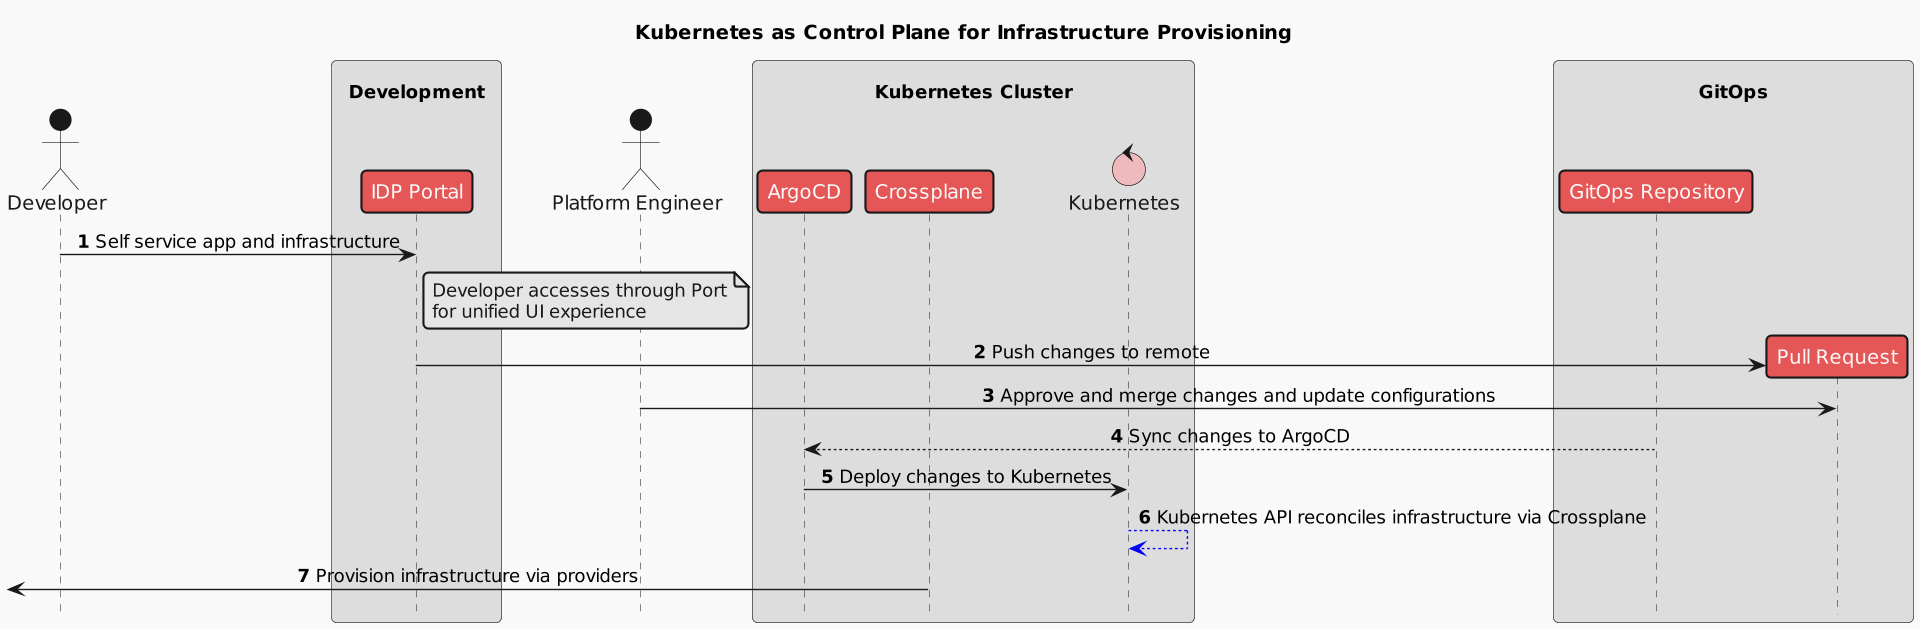


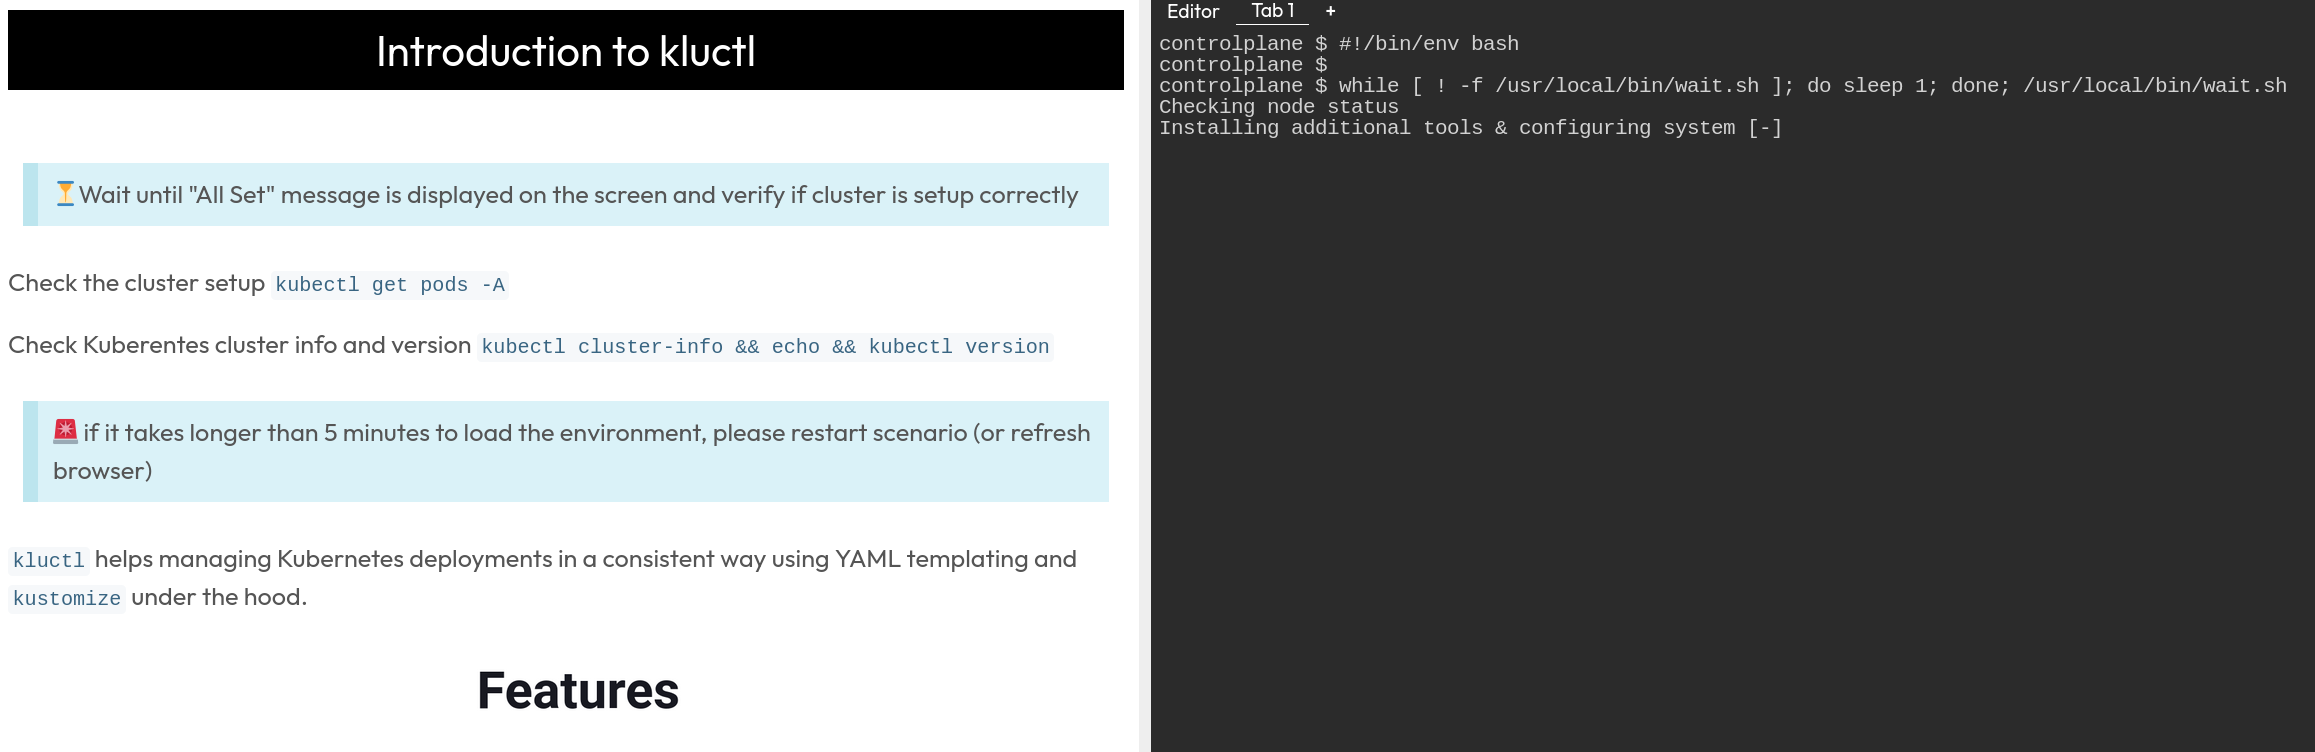 interactive
scenario
interactive
scenario source:
 source:
  Source: Author based on Crossplane.io